Monifa micro:bit

Angus Thomas Horsham, UK.
Saturday, 12th December 2015
When Monifa arrived, I started off reading Nicholas Tollervey's informative account of how MicroPython came to be implemented on the micro:bit, then I set about getting the tools on place on Fedora to build the MicroPython image for the micro:bit's ARM processor. The source, and a README, are here.
On x86-64 Fedora 23, I needed to install the following RPMs:
cmake ninja-build srecord gcc ninja-build libffi-devel redhat-rpm-config openssl-devel picocom pyserial
When it came to cross-compiling the actual image, I downloaded the gcc-arm-linux-gnu tarball from here.
Fedora does come with a version of gcc for ARM, the gcc-arm-linux-gnu RPM. That may well support building binaries for the micro:bit, but I didn't persevere long in trying to make it work before deciding to use the version of gcc from the tarball.
The other required package which isn't available for Fedora is Yotta. To get that. I installed the python-virtualenv and python-pip RPMs, set up a vrtual env, and then used pip to install Yotta.
Updating Yotta requires access to a private repo, as described here. Joe Finney replied almost immediately to my request for access, so I should be able to continue with this.
With that, I was able to compile the micropython image. Nautilus supports transferring the image to the device by dragging and dropping, which was nice and uncomplicated.
With that image booted on the micro:bit, I was able to ge to the interactive python shell using:
picocom /dev/ttyACM0 -b 115200
Next thing was to make some images with different programs linked into them. I downloaded Martin O'Hanlon's snake code, and linked that to the original micropython image:
./tools/makecombinedhex.py -o snake.hex build/bbc-microbit-classic-gcc-nosd/source/microbit-micropython.hex snake.py
Radomir generously send his micro:bob robot (described in his posts below) along with Monifa, so I grabbed his code, and made an image with that linked into it. Radomir told me the two key pieces of information required to work the robot: It needs a 3.7 volt LiPo battery, and, when it comes to connecting the battery, "Plus is on the lower pin, and minus on the higher (outermost) pin of the PCB."
With all that, I was ready to head to the weekly code club at my local primary school and let the children try out the micro:bit. They had a lot of fun, using the interactive shell to their names on the LEDs, then playing Snake, then we wrote a very simple voting program:
    from microbit import *

    display.clear()

    while True:
        if button_a.is_pressed() and button_b.is_pressed():
            display.show(Image.HEART)
            sleep(1000)
            display.clear()
            break
        elif button_a.is_pressed():
            display.show(Image.YES)
        elif button_b.is_pressed():
            display.show(Image.NO)
        sleep(100)
They enjoyed holding up the micro:bit to display their opinion on all kinds of questions.
Radomir's walking robot was the main attraction. As well as, you know, AN ACTUAL WALKING ROBOT, they were interested in the code, which is more complex than what they're used to, but they were able to understand when they took it in stages.
I'll post some updates to the docs at microbit-micropython.readthedocs.org/en/latest/ with details on using Fedora.

Radomir Dopieralski Zürich, CH.
Monday, 30th November 2015
After yesterday's failure I couldn't sleep. Monifa was already packed up, ready to be sent to the next person in the morning, and I spent the night reading the I2C specification and Atmel's notes on TWI on AVR.
In the morning, after reading all the helpful messages on the issue that I reported, I decided to quickly give it one more try, as I got one idea that might possibly work. It turns out, that the address of the I2C device can be specified in two formats. I used the more common 7 bit format, but there is also the 8 bit format. Sure enough, micro:bit uses the latter format, and when I shifted by I2C address to the left one bit, everything suddenly worked.
Don't worry, this will be fixed soon, and micro:bit will be using the more popular 7 bit format, just like Arduino and Raspberry Pi do.
But that was just the beginning of the work. I could move the individual servos of the robot, but I wanted it to walk. So I wrote a quick e-mail to the person who was supposed to get Monifa after me, apologizing for the delay, and worked on it some more in the evening.
I will spare you the tale of the frustrating hours of tuning the positions and getting the inverse kinematics calculations right. I have done it many times before, but somehow it haven't become easier. Finally, I could control the position of each leg individually and of all of them at once:
But the work is not finished yet. Next comes programming the actual walking. I decided to start with the creep gait, which is statically stable and slow -- perfect for testing. I wrote all the code that was supposed to move the robot, and got a MemoryError. The poor Monifa simply couldn't remember all the things I made it do. Sigh. I went over all the code and optimized what I could. Finally, after squashing some additional bugs that crept in there, my code kinda worked when run from the Python console. So I added a few lines to make it run by default, so that I could unplug the robot from the computer and make it walk on its own. And I got a RuntimeError: maximum recursion depth exceeded. So I went over the code again, flattening what I could and inlining functions and methods. Finally, I got it to walk:
I know, it looks very sick and weak. That's probably how it feels too. It was a quick hack, and there is a lot I had to remove or simplify. I'm also sure that a lot could be improved. But I got it done and the next person is waiting, so Monifa goes on its way today.
In case you want to look at the code, it's in this repository.
Radomir Dopieralski Zürich, CH.
Sunday, 29th November 2015
I finally found some time to work on connecting the micro:bit to my super-cheap quadruped robot, Tote.
Since I need to control a dozen servomechanisms here, I decided that it's best to not connect them directly to micro:bit pins (it seems that the current build of Micropython can only do PWM output on the analog pins, and there are only six of those), but instead to program the Arduino that normally controls them to listen over I2C connection, and move the servos to the positions that it gets from there. I already had the code for that, because that's how I plan to connect a Raspberry Pi to it later on.
So uploaded the firmware to the robot, and connected the I2C lines to the micro:bit:
Then I connected the micro:bit to USB and tried those commands:
    import ustruct
    import math
    from microbit import i2c

    i2c.write(0x04, ustruct.pack('bf', 0, math.radians(45)))
This should have moved the tip of the font left leg by 45° forward. But nothing happened. Not even an error.
Surprised, I tried the same thing with a Raspberry Pi:
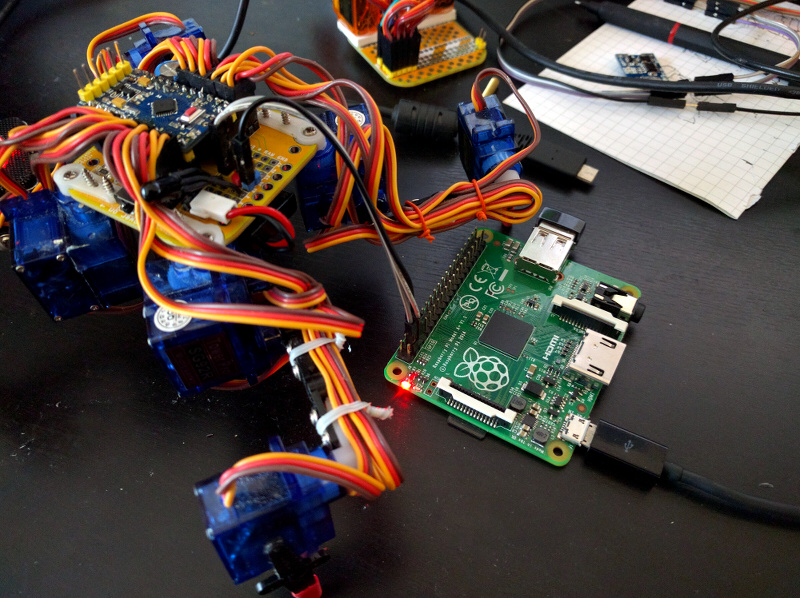
This time it worked correctly. It seems that there are still some problems in the I2C support on the micro:bit. Unfortunately, this means I will not be able to control my robot with it just yet. I have to send Monifa on its way to the next person on the list, so I guess the next opportunity I will have to try it is when micro:bit is released to the general public, provided I will be able to buy one.
Radomir Dopieralski Zürich, CH.
Wednesday, 26th November 2015
Today was a programming day. I sat down and wrote the
code that controls both micro:bot and micro:bob.
The micro:bob is quite simple — it only has
a preprogrammed sequence of leg movements for walking.
I made a Servo class for convenience, and
then some functions for making a step with left and right
legs. I also added some faces. I should probably also add
some turning and maybe a small dance, but I was pressed for
time, so I left that for some other time. For now, behold,
micro:bob walking:
The small shaking at the beginning is there to work around a bug with the PWM signal. Hopefully this will get fixed and won't be needed anymore.
You can also see that the robot twitches a little when it's just standing still. That's another bug in the PWM.
All the code is available in the micro:bob repository.
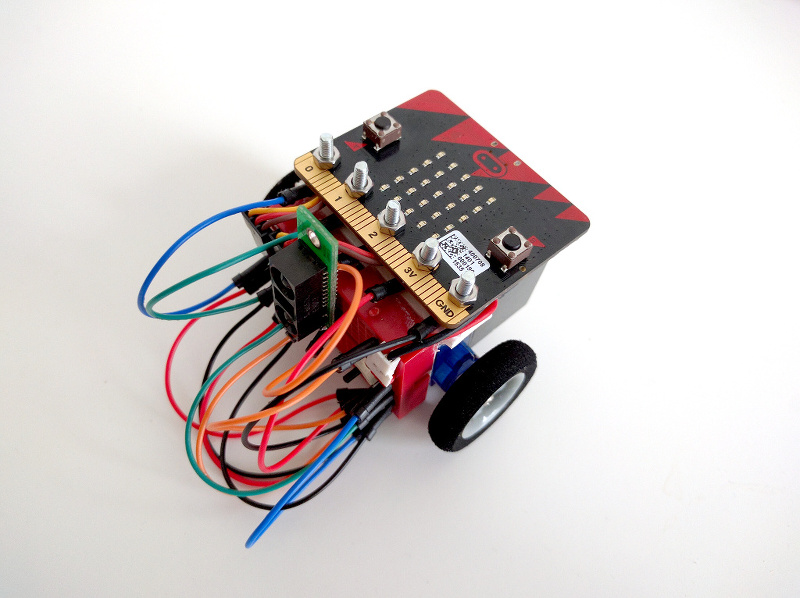
Next comes the micro:bot. I already had it riding across my room, but now it's time to add some intelligence. I started by checking how fast it goes straight and rotates, so that I could use proper timing for the commands that make it go a specified distance and turn a specified angle. Having done that, I proceeded to calibrate the distance sensor it has mounted at the front (just a simple SHARP sensor from Pololu, but note that it has to run on 3V). Then I coded a simple obstacle avoidance procedure: if the distance sensor shows an obstacle less than about 10cm ahead, then stop, turn 20° to the left, check the distance, turn back and 20° the right, check distance, turn back, compare the two distances and turn 60° in the direction that has more free space. It works surprisingly well, as long as the robot doesn't hit something that it didn't see:
The code is in the micro:bot repository.
All in all, it was quite fun to use the micro:bit and I hope the kids will have fun too.
As the last thing, I will try to make it control Tote, a quadruped robot that I'm developing.
Radomir Dopieralski Zürich, CH.
Wednesday, 25th November 2015
I didn't really have much time to properly program the micro:bot (that's what I decided to call it), but I did construct a brother for it, micro:bob.

This one is a walking robot based on the popular Bob design. It has four servos, but two of them are connected to the same signal pin, so I can control it with just the three pins that are available as large pads. I didn't have another small breadboard, so instead I used a servo breakout board that I had lying around. A veroboard would work as well. The rest is just some pieces of soft plastic and a lot of hot glue.
Tomorrow I will try to program both robots to do something interesting.
Radomir Dopieralski Zürich, CH.
Tuesday, 24th November 2015
I received Monifa, and put it on the robot in Mahiri's place. Then I tried to get the robot going, but ran into some problems with the PWM signal from the micro:bit.
It turned out to be two separate problems. One is that setting the PWM period doesn't seem to work reliably at the moment. I actually went to my local hackerspace and used their osciloscope to look at the signal:
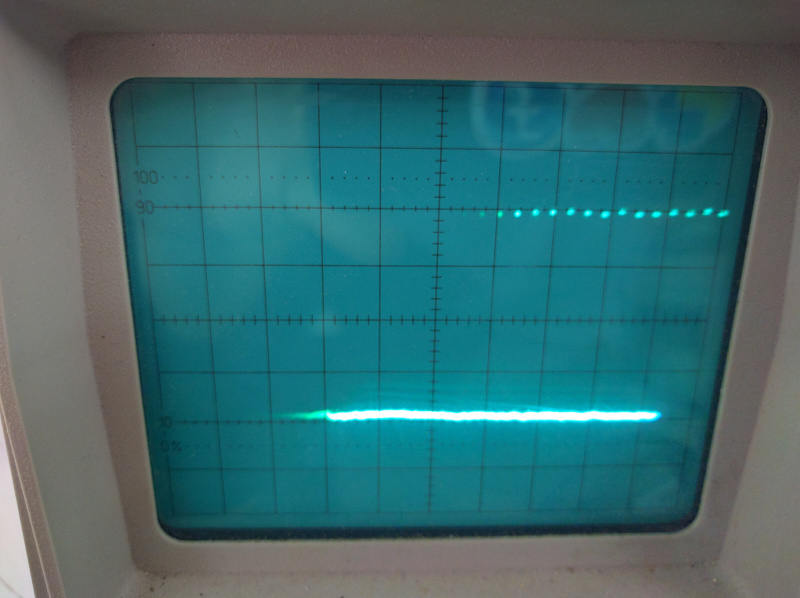
Hopefully that will be fixed before it's shipped.
The other problem was powering the servos with 3V from the two AAA batteries that I have used. Turns out that servos rated for 4.6V don't really like that. I replaced the batteries with a 3.7V LiPo battery, and now it works much better.
I also figured out how to append the Python script at the end of the hex file with the firmware. Turns out that after you run it through the "hexlify.py" script and append at the end, you still need to find and move the "end of file" line, which looks like this:
:00000001FF
Then just drag-and-drop the file into micro:bit, and the robot can go on its own:
Now I just need to make it use that sensor (and maybe the compass too?).
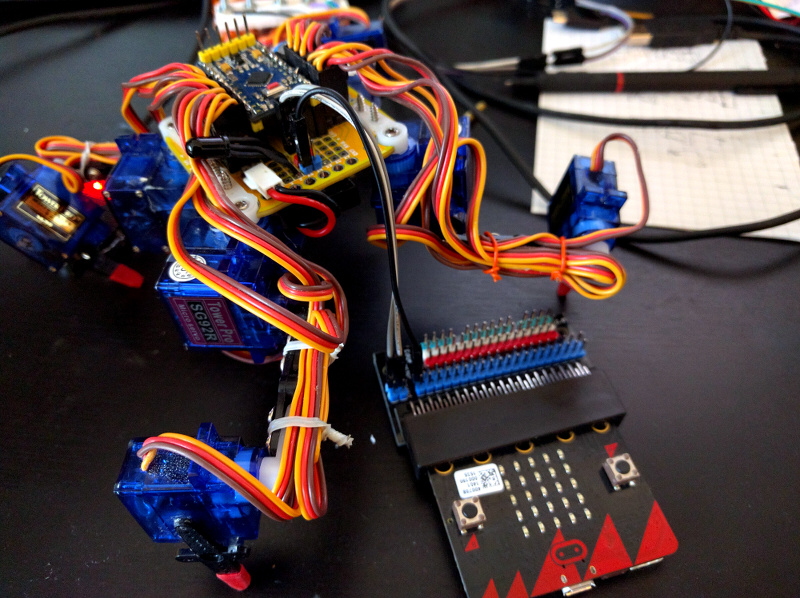
By the way, I also got an edge connector, to get to all the other pins on this board. After some assembly, it looks like this:
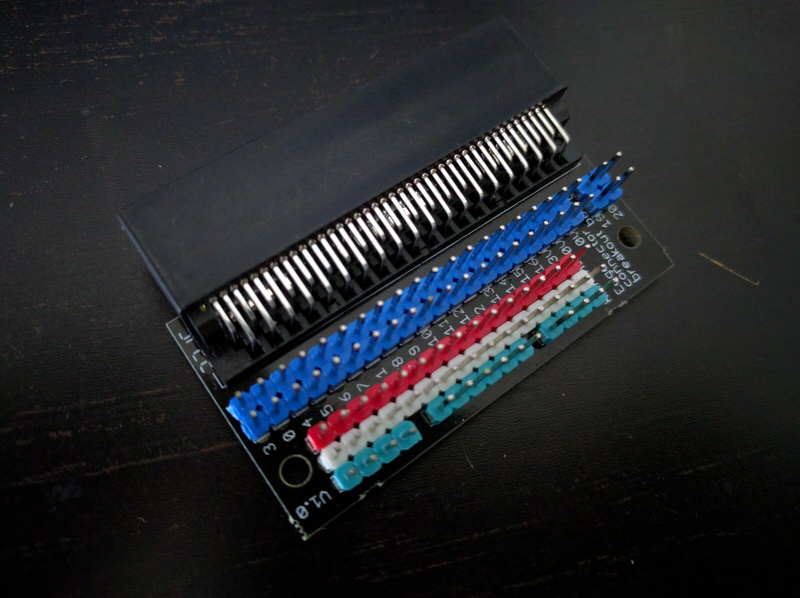
I like how they added the three rows of pins at the bottom, for easily connecting your own stuff. But I hate that they got the order of the two power rows wrong. It should be ground-power-signal, from the top, not power-ground-signal. This way you cannot connect RC hobby servos to this or other common sensors (ground-power-signal is a kind of a standard). Oh well.

Nicholas Tollervey Towcester, UK.
Thursday, 19th November 2015
Radomir killed poor old Mahiri so welcome to the world Monifa micro:bit.